Friday, January 13, 2012

Bacon & Broccoli Cheddar Soup

I grew up in New England, which means I should be accustomed to the cold weather.  I'm not.  Schmambs grew up all over, but she wasn't engineered to withstand cold weather.  Since our daily threats of moving to a warmer climate didn't seem to be getting us anywhere, we decided we should make soup instead.  A recent issue of Food Network Magazine featured a delicious-looking broccoli cheddar soup on the cover.  We like cheese.  We like broccoli.  We like hot bowls of soup on cold wintry days.


Oddly, it was Schmambs, not me, that came up with the idea of slightly altering the recipe by adding bacon to the soup.  As any sane person would tell you, bacon makes everything better.  Am I right?  In goes the bacon.


This recipe called for all hands on deck.  While the bacon was frying, Schmambs took care of cutting the onion and celery while the kido peeled potatoes and even though I was supposed to be helping with the potatoes, I took pictures.  Eventually I had to abandon the camera and take over potato peeling from the kido.  She was doing a great job, but we were looking to eat before the new year and tummies were starting to grumble.

The recipe called for two unusual ingredients that had Schmambs and I scratching our heads for a while, contemplating the texture of the final product.  Russet and sweet potatoes.  Not a fan of the sweet potato, I wasn't sure I was going to like the flavor of the soup.  The kido doesn't like "sweet tomatoes" and declared that she wasn't going to have any soup for dinner that night.  


With everything sliced and diced, we were finally ready to start building the soup.  We cooked the celery and onion in the bacon fat before transferring them into a pot with the potatoes, half and half, chicken broth, water, and bay leaf.  When the potatoes became tender, it was time for them to meet their fate with the blender's blades.  Schmambs was not equipped with an industrial size blender, so we had to puree the soup in batches.  Of course, our first instinct after pureeing the first batch was to taste.  Without the cheese or broccoli, I'll be honest...it tasted like a sweet potato puree.


Veggies are not very popular at la Casa de Schmambs.  Will eats the occasional greenery, but the kido tries to avoid them at all costs.  But there's no getting around your veggies if they're chopped up and mixed in an ooey gooey delicious soup, is there?  Especially when the soup is made out of cheese.  


With the broccoli thrown in, it was starting to look a lot more like the picture on the magazine cover.  Even though the recipe instructed us to cook the broccoli prior to adding it to the soup, we decided to forego that step.  The reason is simple.  We wanted  our soup to look exactly like the soup in the magazine picture and we didn't think the broccoli would hold its shape in the thick soup if it was cooked.


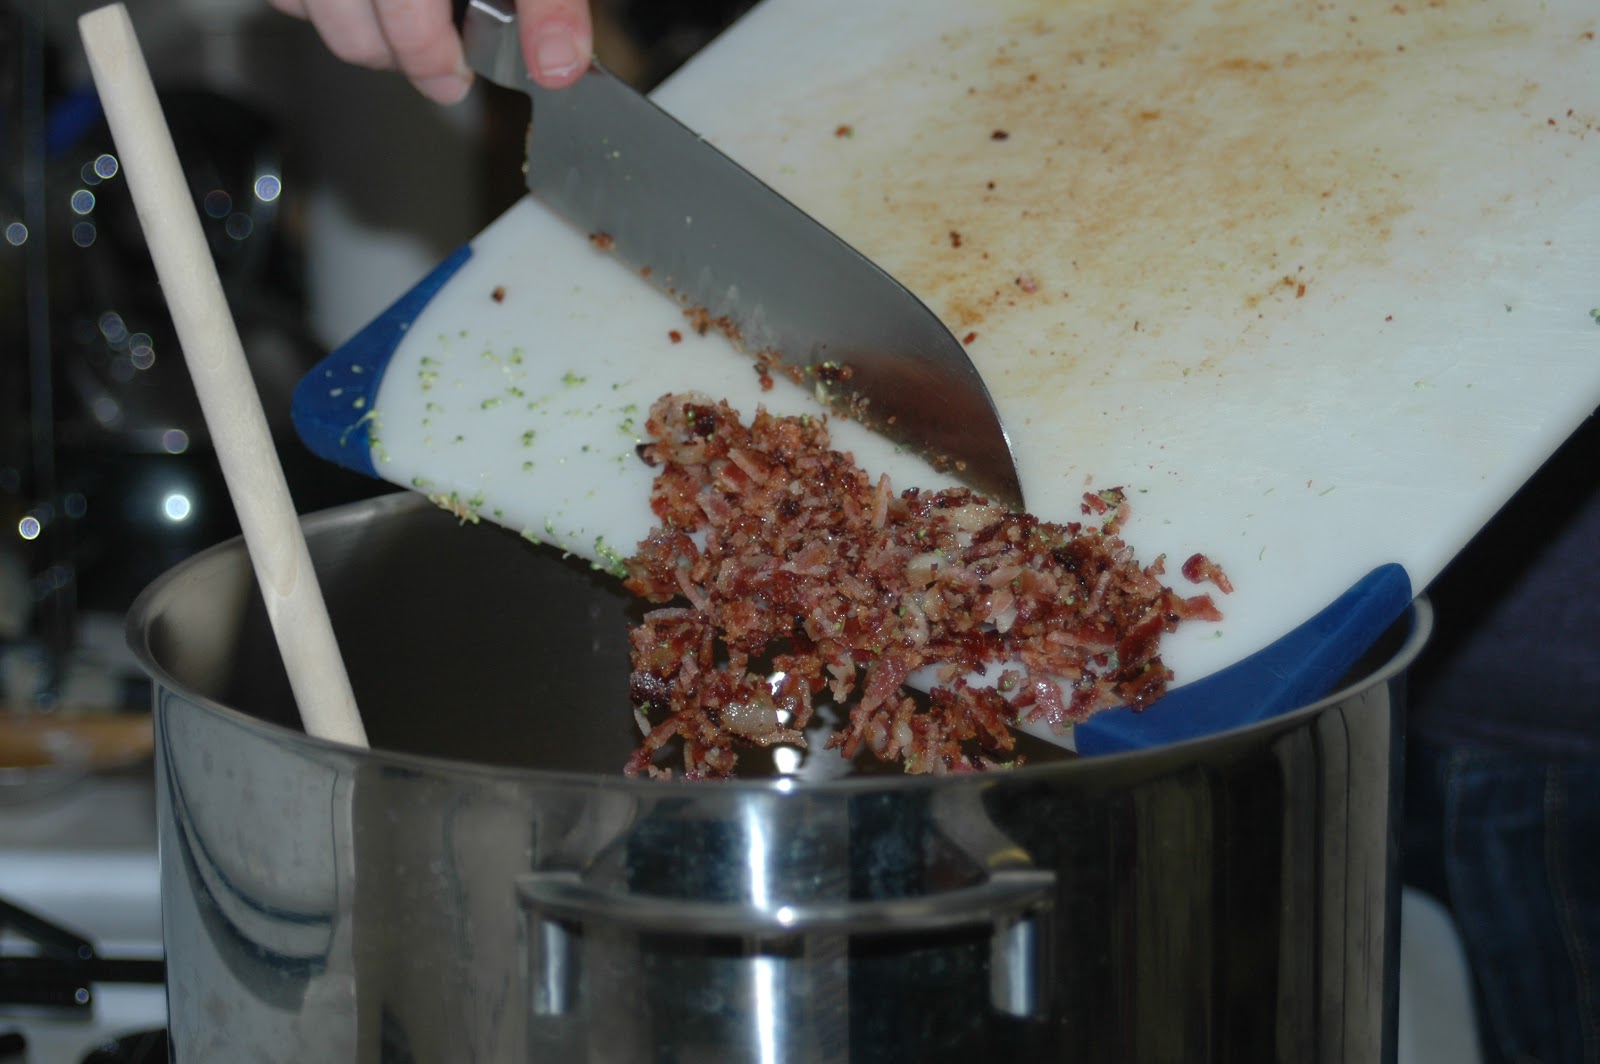
Onto my favorite part.  The bacon, of course!  Schmambs did a fantastic job at chopping the crispy slices into so many little pieces that I got a little bacon in every spoonful of this soup.  I think the bacon even won the kido over who, after tasting the final product, changed her mind about "sweet tomatoes" since she couldn't taste them and asked to have a bowl of soup for dinner.  We told her we had figured she'd like it and already had a bowl ready for her.  With all the ingredients mixed together, we decided that next time we need to reduce the amount of sweet potatoes since it was still a little too sweet for our liking.  However, it was incredibly delicious and truly hit the spot.
While planning the dinner menu one night, we decided that we were going to serve our soup in bread bowls.  Everyone else does it.  Why should we be any different?  So an idea was born.  Originally we thought it would be easy to pick a few up pre-made ones from the local grocery store.  The store we went to didn't have them.  Bummer.  Most people would shrug and eat soup from a regular bowl.  Oh no.  Schmambs and I were determined (and ambitious) to have our soup from a bread bowl.  When we explained our quest for bread bowls to the guy working in the bakery, he directed us to pizza dough.  He told us we should be able to get the same result.  He was right.  Thankfully Schmambs has some bread smarts since I would've been clueless otherwise.  After proofing the dough, Schmambs brushed some egg wash over the dough to hopefully give it a nice golden color.  

We did it!  I never doubted Schmambs, but I was impressed that it turned out successful, since there had been some doubtful moments.  Clearly you cannot ladle soup into big balls of bread.  Something had to be done.  Schmambs took control.  A little cut here, a little scoop there, voila!

Dinner is served.  


Bacon Broccoli Cheddar Soup

1 medium onion, finely chopped
2 stalks celery, finely chopped
2 cups chicken broth
2 cups half and half
1 pound russet potatoes, peeled and chopped
1 pound sweet potatoes, peeled and chopped
1 bay leaf
2 cups broccoli florets, chopped
salt and pepper
1/3 lb sharp cheddar cheese, shredded
1 lb bacon

Fry the bacon in a skillet.  Once the bacon is done, lay on paper towels to drain excess oil.  In the bacon grease left in the skillet, add the onion and celery and cook over medium-high heat until softened.  In a large pot, combine the onion and celery with chicken broth, half and half, potatoes, bay leaf, 2 cups of water and a pinch of salt & pepper.  Bring contents in the large pot to a boil before reducing the heat to a medium low and simmer until the potatoes are tender, stirring occasionally.  Cook Heat the olive oil in a large pot over medium-high heat.

When the potatoes are tender, remove the bay leaf from the soup and transfer the contents of the large pot into the blender.  You can repeat this step in small batches if your blender isn't big enough.  Simmer the blended mixture in the pot while adding the cheese and stirring until melted.

Ladle soup into bowls and enjoy!

Tuesday, November 22, 2011

Fresh Mint Chocolate Chip Cookies

I have a love affair with bacon.  Schmambs has a love affair with mint.  Schmambs and I discovered Wegman's a few weeks ago.  And Wegmans has mint chocolate chips, which Schmambs can't seem to find at any other grocery stores.  Excited, Schmambs threw a couple bags in the cart and declared that we were going to make Fresh Mint Chocolate Chip Cookies.  Having tasted these cookies the last time she made them, I hopped on board and made a cookie date with her.

The recipe claims that the recipe makes 3½ dozen cookies.  When Schmambs suggested we double the recipe, I thought it was because she was worried she wouldn't have any for herself after her hubby and kido devoured them.  It wasn't until later that I realized it was because Schmambs makes BIG cookies.  The first step was to mix the butter, sugar, fresh mint leaves, and eggs.  However, Schmambs got distracted in helping me figure out how to use my "new" camera (a hand me down from my dad), and we mixed the butter and the sugar before realizing we forgot to also add the mint and eggs.  Oops.


Sheepishly, I put my camera down and went back to the original task that Schmambs had assigned to me before I started having camera difficulty.  Chopping up the mint.  The kido, also on hand to help, got assigned the task of cracking the eggs.  For a six year old, she did great.  No shells! 


Next came the flour.  After pouring most of it in and watching it mix in the bowl, Schmambs expressed concern that the cookie dough might be a little too dry.  This was the first time that she had tried doubling the recipe and the dough wasn't coming out in the consistency that she was accustomed to.  We took our chances and forged ahead with crossed fingers that everything would come together.


Let's take a minute and talk about mint chocolate chips.  Most people who know me know that I am not a big chocolate person.  I think it's because it tends to be too sweet for my tastes.  I usually prefer the chocolates that incorporate mint, which brings down the sweetness level.  So mint chocolate chips are perfect for my tastebuds and are super delicious.  As these were mint chocolate chip cookies, we used a little over a bag and a half so you had a chip in every bite.

Everyone has their own way of scooping dough onto the cookie sheet.  Schmambs globs the dough out with a tablespoon and uses another spoon to plop it on the cookie sheet.  It comes out looking a little something like this.

I, on the other hand, have always rolled my cookies into little balls.  I think I almost gasped in horror when I saw that Schmambs was just plopping the dough down.  While hers was a more efficient method, I am proud to say that mine came out almost symmetrical.

When Schmambs makes these cookies, she usually puts them in for about 7-8 minutes.  The recipe told us that they would end up a "golden brown".  Fail.  The cookies came out as pale as they were when they went in.  I'll admit, it was slightly disappointing, but it didn't take away from the flavor at all.  The cookies were still delicious and they are going like hotcakes at la casa de Schmambs.  Even my Ziplock baggie of cookies at home has mysteriously sprouted holes the size of kitty teeth!  Thankfully all cookies were accounted for before they ended up in my belly.


Fresh Mint Chocolate Chip Cookies

1 1/3 Cups sugar
¾ Cup margarine or butter, softened
1 Tablespoon finely chopped mint leaves
2 Cups All-Purpose Flour
1 teaspoon baking soda
½ teaspoon salt
1 package (10 oz) mint chocolate chips

Heat oven to 350 degrees.  Mix sugar, butter, mint leaves, and egg in a large bowl.  Stir in flour, baking soda and salt.  Stir in chocolate chips.

Drop dough by rounded tablespoonfuls about 2 inches apart onto ungreased cookie sheet.  Bake 11-13 minutes or until golden brown.  Cool slightly; remove from cookie sheet.

Thursday, November 3, 2011

Nachos Individuales

It's a Sunday.  During the fall.  Do you know what that means?  Football, of course!  Being Bostonians, we are Patriots fans and each week, we gather at la casa de Schmambs for some Football!  And what does Schmambs feed the masses that gather at her house?  Buffalo wings and nachos, of course.  Although, typically, Will makes the nachos since Schmambs slaves away all afternoon making the wings.  This particular Sunday though, Will decided to let the women make the nachos since there were two of us and only one of him.  Twice the work in half the time.  In reality, the Pats were probably playing really well and he didn't want to get pulled away.

What are nachos without fresh guacamole?  Bland.  That's what.  So we made guacamole.


When you order nachos at a restaurant, it's usually a pile of tortilla chips with the toppings thrown on top.  That's great and all, but when you get to the bottom pile, there isn't anything left to eat with your chip.  No gracias.  Will devised the best of all worlds.  Individual Nachos.  He uses Tostitos Scoops so that each chip is filled with all the yummu goodness that you would typically find on nachos.  No chip is left unloved.  


In a saucepan, mix a can of refried beans with one packet of taco seasoning.  I believe Schmambs usually uses Ortega or Old El Paso brands.  Once the seasoning and beans are mixed and heated, scoop the beans into each Tostitos Scoop.


Schmambs usually uses a shredded Mexican blend of cheese from the grocery store.  Sprinkle a satisfying amount of the cheese blend on each nacho and once complete, throw it in the oven for a few minutes to allow the cheese to melt and to slightly toast the tortilla chips.

The guacamole that we made earlier was scooped into each chip as well as a generous dollop of sour cream too.  While the chips were in the oven, Schmambs had cut up the jalapeno peppers that were going to top our nachos to give it a nice kick as well as some crunchy texture.  The last time I tried to cut jalapeno peppers at la casa de Schmambs, she failed to tell me that soap would not get the spicy out of my fingers.  I learned the hard way when I tried to take my contacts out later that night.  Needless to say, Schmambs is now forever on jalapeno duty.  


We realized in hindsight, the nachos probably would've been more aesthetically pleasing if we had put the guacamole under the sour cream to break up the greens, but they still look delicious in their current state, don't they?


Individual Nachos
by Schmambs & Will

* 1 16oz can of Ortega Refried Beans
* 1 packet of Ortega or Old El Paso taco seasoning
* 1 package shredded Mexican blend cheese
* jalapeno peppers cut diced (optional)
* sour cream (optional)
* guacamole (optional)
* salsa (optional)

Pick through bag of chips and place all non-broken chips on cookie sheet.  Combine beans and taco seasoning and heat on stove.  When done heating, scoop beans into each individual chip until all chips are filled.  Sprinkle cheese on top of the beans and place cookie sheet in 300 degree oven for 3-5 minutes or until cheese is melted.  Remove cookie sheet from oven and place desired toppings on nachos.  Serve while hot.

Wednesday, November 2, 2011

Chicken with Provencal Sauce

I lived in New Jersey for six years.  While I was living there, when I wasn't ordering take-out, I was attempting to improve my cooking skills to make me more desirable to a future mate.  I even joined an online recipe swap and thru that, a dinner group.  While the dinner group didn't exactly work out (the other ladies in the group were on a far more advanced level than I), I continued to try and master dishes in the privacy of my own home.  My then-boyfriend happily played the part of guinea pig as a home-cooked meal was very rare in our house.  There was one recipe that I continually tried to perfect.  I'm not sure if it was because I knew I could cook it successfully, even if it didn't turn out exactly the way the recipe described it, or because Herbes de Provence ain't cheap and I was determined to finish the bottle, but when I made chicken, this is what I made.

Fast forward a few years.  I've watched a lot more Food Network cooking shows.  I know more things now.  I also have my own personal chef, Schmambs, who has also taught me a thing or two.  The other day, while in the grocery store, Schmambs asks me what she should make for dinner that week.  I suggested tacos.  She vetoed.  I suggested key lime pie.  She told me that wasn't a dinner food.  I got distracted and started talking about carrots.  Distraction is a good thing.  Next thing I knew, I blurted out that I would cook something.  "You??  What are you going to cook??", Schmambs scoffed.  "Chicken with Provencal sauce!"  After a bit more teasing, it was decided that I would give Schmambs a break from dinner and I would cook for us.  Pretty much one of the only things I know how to cook.  And not even that well.  This was our adventure.


The first step would be to trim the chicken breasts to make sure you get rid of the extra flab & fat.  Since these were regular sized breasts, the recipe required the meat be pounded to a ½ inch thickness.  I used to bypass that step by buying the thin sliced chicken breasts.  Having experienced the meat mallet and the awesomeness of being able to whack meat with no boundaries, I don't think I'll ever bypass this step again.


After your chicken breasts have been smooshed enough, season them evenly with salt and pepper.  As you can see, some of the chicken breasts ended up much bigger than others.  Looks like that's a skill I still have to work on perfecting.  


Once the chicken breasts are seasoned, toss them in a non-stick skillet with some olive oil.  Our skillet could only fit three pieces at a time.  And because I was unsuccessful at getting them thin enough, we had to throw the cover over the skillet to ensure that each breast would be cooked thoroughly and safe for consumption.  After we finished cooking the chicken, we threw them in the oven to keep them warm while we made the sauce.


Now, the sauce has always given me problems.  No matter how many times I followed the recipe, the sauce always came out very runny and very broth-like.  As mentioned before, I have watched a lot more Food Network shows since I lived in New Jersey.  And I now know what a roux is and how it can help with whatever dish you might be making.  Schmambs and I have used it for Baked Mac & Cheese in the past.  As an idea on how to make the sauce thicker, we decided to try a roux and make the sauce a little differently than I had previously.  


The recipe says to cook a clove of minced garlic in the skillet before adding the chicken broth and Herbes de Provence.  We cheated and used pre-minced garlic from a jar.  After the garlic cooked for a minute, we added the butter (typically added into the sauce as the last step), and flour to make a garlic roux.  While we didn't really know the ratios, Schmambs just kept sprinkling flour into the skillet until it became a paste-like consistency. When the roux was finished, we added chicken boullion cubes and 2 cups of water and the Herbes de Provence.  We doubled the sauce measurements because I always felt like there wasn't enough when I made it.  We wanted to make sure everyone had enough.  Better to be over than under, I always say!


The sauce turned out to be a huge success.  After bringing the sauce to a boil and making sure the roux was mixed in completely, the sauce seemed to thicken as we continued to let it cook.  It had the consistency of an alfredo sauce and twice the flavor.  I would highly recommend trying the thicker version as it makes it feel like you are enjoying an accompanying sauce rather than having chicken rice soup on a plate.  We decided to pair the chicken on top of rice with a side of boiled spinach.  Makes for a very delicious meal!


Chicken with Provencal Sauce
adapted from the recipe by Lyn Corsale

* 4  - 6 oz skinless, boneless chicken breast halves
* ¼ tsp salt
* ¼ tsp freshly ground black pepper
* 1 ½ tbsp olive oil
* 1 garlic clove minced
* 1 cup fat free, low sodium chicken broth
* 1 ½ tsp dried herbes de Provence
* 1 tsp butter
* 1 tsp fresh lemon juice
* 2 tsp flour
* fresh thyme sprigs (optional)

Place each chicken breast half between 2 sheets of heavy duty plastic wrap, pound to ½ inch thickness using a meat mallet.  Sprinkle with salt and pepper.  Heat oil in a large nonstick skillet over medium heat.  Add chicken, cook 6 minutes on each side or until done.  Remove chicken from pan; keep warm.  You can place heat your oven to 200 degrees, if desired.  Add garlic to pan; cook 1 minute stirring constantly.  Scrape pan to loosen browned bits.  Add butter to skillet and wait until butter has melted.  Sprinkle in flour until mixture is a paste consistency.  Add broth and herbes de Provence and bring to a boil.  Cook until broth mixture begins to thicken (about 3-5 minutes).  Remove from heat and add lemon juice.  Serve sauce over chicken.  Garnish with thyme sprigs in desired.


Monday, August 15, 2011

Shepherd's Pie Eggrolls


Every year for my birthday, Schmambs makes me dinner.  How is that different from every other night?  For starters, I get to choose the menu.  The best part about Schmambs is that she will cook anything my little Asian heart desires, even if she's never made it before.  Last year was easy.  We had a Thanksgiving Feast since she makes this amazing bacon turkey.  This year, I had Shepherd's Pie on the mind after stumbling across a recipe for a Sweet Potato Chipotle Sheperd's Pie from the Deen Brothers (you know, Paula's boys).  Not a fan of sweet potatoes, I thought it would be fun to have a traditional Shepherd's Pie.  Then, since Schmambs and I have been brainstorming eggroll recipes for the fast approaching football season, we thought we would try Shepherd's Pie Eggrolls.  And to make it that much better, we were going to add bacon to the mix.


Schmambs has this amazing ability to multi-task.  If it were left to me, I'd probably burn the house down.  This is probably why I leave all the more elaborate dishes to be made at Schmambs' rather than when I'm home alone.  She had the bacon cooking while she browned the ground beef.


After the beef was browned, she drained it and mixed in some whole kernel corn and fresh chopped celery.  A typical Shepherd's Pie calls for carrots, peas, and onions.  Schmambs cut up an onion and tossed it in the skillet to be cooked before adding it to the beef, corn, and celery mixture.  Schmambs isn't a fan of peas (I don't love 'em, but don't mind them) and I am not particularly fond of cooked carrots, so we decided to leave those out and substitute with the celery.


Once the onions were done cooking, she added them in as well.


Are you drooling yet?  Remember that bacon that Schmambs had been frying?  It was now time to add that crispy bacon.  To ensure a piece of bacon in every bite, Schmambs chopped all the strips up before throwing it in the beef mixture.  In a traditional Shepherd's Pie, the beef mixture is covered with mashed potatoes.  We couldn't leave those out.  Instead of slaving away at mashed potatoes from scratch, we took the shortcut and made instant mashed potatoes.  We're not proud of it, but the project was already labor intense and hungry stomachs needed to be fed.  And to be quite honest, they weren't all that terrible when combined with all the other ingredients and fried.


Then comes the fun part of putting the eggrolls together.  Despite all the eggrolls we have made in the past, we are still trying to perfect the rolling process.  Some come out too fat.  Some resemble blobs more than eggrolls.  The insides of the Shepherd's Pie eggrolls look a little something like this.  Oh yeah, did I mention that we threw some cheese into the mix too?  This cheese happened to be a Mexican blend from Jalapeno Nachos we made the other night.  I would probably recommend a Cheddar cheese if you were going to try making these at home.


We used a package of eggroll wrappers and decided that we probably had enough eggrolls to feed an army and we would save the remaining mixture to make more eggrolls another night.  Schmambs heat the oil up and in went the eggrolls.  Pop pop pop went the oil.  Sizzle sizzle sizzle went the eggrolls.  Before long we had a pile of piping hot Shepherd's Pie eggrolls ready to be consumed.


A traditional Shepherd's Pie has the beef in a gravy.  Since we were making it in eggroll form, we didn't want too much liquid in the filler since that gives the eggrolls more opportunities to leak when we're frying them, so we decided to dip them in gravy.  Nothing hard.  A package of Brown Gravy from McCormick's and call it a day.  We were famished by the time we finished that I wanted to get a picture of the final product and dig in, so regretfully, I do not have a picture of the eggroll with all it's gravy goodness, but it was delicious.