Tuesday, December 21, 2010

Baked Bacon Mac & Cheese

I've made baked mac & cheese twice.  Both times, I was under the watchful eye of Schmambs.  But one Sunday, in an effort to reduce the number of times of eating out during the week, I thought I would try making baked mac & cheese.  Solo.  Ohmygoodness.  I can't even tell you how many text messages flew back and forth between Schmambs and myself as I perused up and down the aisles of the grocery store hoping to pick up everything I would need for the recipe.  The first time we made it, we used a recipe off All Recipes.  It was phenomenal.  But then Schmambs discovered Alton Brown's recipe on Food Network and I mean, how do you say no to Panko?  That's right.  You don't!

The first step is to start cooking the pasta while you make the cheese sauce.  I sort of had to because I only have one big pot and I needed that for cooking the pasta and making the cheese sauce.  With the pasta cooking, I thought I would get the liquid ingredients started  so that all I would have to add was the cheese once the pasta was finished cooking.  

One of the things I love about homemade mac & cheese is that you, the chef, can determine the thickness of your sauce by creating a roux.  For those of you who don't know what a roux is, Merriam-Webster defines it as "a cooked mixture of flour and fat used as a thickening agent in a soup or a sauce".  In vivz terms, it's a thickener consisting of butter, flour, and some sort of liquid.  In the case of baked mac & cheese, the liquid is milk.  Once the butter is melted in the saucepan, you whisk in the flour.  As per the recipe, along with the flour, I added mustard powder.  It sounds a bit odd...mustard powder in baked mac & cheese...really?!  But it gives the cheese sauce a nice flavor while not being overwhelming.  And since I forgot the onion at the store (it must've been all the texting back and forth that I got distracted!) I substituted with onion powder.


flour, mustard powder, onion powder, salt

One thing that surprised me was that the recipe called for milk and not cream.  The other recipe that we had tried required cream.  A lot of it!  Alton seems to know what he's doing, so I figured it might be a good idea to just follow his directions since he was the only help I was going to get this time around.  In went the milk and then all of a sudden I found myself with a saucepan full of watery milky yellow stuff.  The directions told me to let it simmer, so I did while I took the pasta off the stove and drained it.


Now while the sauce was getting all simmered and cooked and stuff, I decided to take the time to make some bacon.  Somewhere along the line, I had decided I was going to try this recipe with bacon.  Why?  Because I'm a firm believer that bacon makes everything better.  I eat meals which consist of bacon.  Nothing else.  And I think I've mentioned before, I enjoy mnicrowave bacon, which I'm not sure if that's a good thing to admit, so let's move on.  I took the shortcut of making microwave bacon because I was on a time crunch and because I still haven't perfected the art of making bacon on the stove.  A story for another time.  I couldn't help but salivate while looking at my plate of bacon.  It took a lot of will power to not eat any all of it while I prepared the cheese sauce. 


As you can see, the cheese sauce turned out a bright orange/yellow and it was melty and gooey.  I mixed in the elbow macaroni in the sauce when it was all ready and then I mixed in crumbled pieces of bacon into the pasta/sauce mixture.  Not that it needed it, I let the mixture sit for a few minutes while I prepared the panko topping.  I melted butter in a skillet and then mixed in about a cup of panko breadcrumbs.  I'm not sure if I overestimated my skillet's abilities, but the topping didn't end up like it should have.  The butter did not evenly distribute throughout the panko so it caused some of the breading to eventually just sprinkle off, despite being baked into the mac and cheese.  I also did go a little overboard with loading the tops of the mac & cheese with panko.  I guess there is such thing as too much when it comes to breadcrumbs.  The lessons we learn.


I ended up making two separate pans of the mac and cheese because a) I used LARGE elbow macaroni so it took up a lot more space and b) I'm a single young professional and there's only so much food i can consume before it goes bad.  So I was going to drop a pan off with Schmambs & Company and have them be the guinea pigs to my cooking.  I'll admit, after giving it a whirl, I realized it was a bit bland and I could have done so much more with it.  


Baked Mac & Cheese:
(adapted from Alton Brown's recipe)


1/2 box large elbow macaroni
* 3 tablespoons butter
* 3 tablespoons flour
* 1 tablespoon powdered mustard
* 3 cups milk
* 1 tablespoon onion powder
* 1/2 teaspoon paprika
* 12 ounces sharp cheddar, shredded
* 1 teaspoon kosher salt 
* Fresh black pepper
* 8 slices of bacon, crumbled (this is only a suggestion.  use as much bacon as you want!
* 3 tablespoons butter (for the topping)
* 1 cup panko breadcrumbs (for the topping)


Preheat oven to 350 degrees.  Cook the pasta in a large pot of boiling water until it's "al dente".  Drain the pasta when done.  While the pasta is cooking, melt 3 tablespoons of butter in another saucepan or pot.  Whisk in the flour, mustard powder, and onion powder until it's lump-free.  Slowly mix in the milk and paprika.  Make sure everything is mixed evenly and there are no lumps.  Then let the mixture simmer for about ten minutes.
While it's simmering, cook 8 strips (or however many slices desired) of bacon.  Let the oil drain and then crumble it up.  Put aside.  Stir in the cheese (a little bit at a time) to the milky mixture.  Stir until cheese is all melted and your mixture is all gooey.   Add salt and pepper to your liking.  Then add the bacon.  Once everything is evenly mixed, pour it into the macaroni and stir until all the pasta is evenly coated.  
While you're mixing the pasta and cheese together, melt 3 tablespoons of butter in a saucepan.  When it's melted, add the panko breadcrumbs and coat it evenly with the butter.  Depending on what type of pan you're using, you may want to spray it with some sort of cooking spray.  My spray of choice is PAM.  This will keep the cheese sauce from sticking to the edge.  Once everything is done, distribute the pasta and sauce in two 8x8 pans.  I just used disposable aluminum square pans and they seemed to work fine.  Distribute the panko breadcrumbs over the macaroni in both pans.  Place pans in oven which should be 350 degrees and bake for 30 minutes.  I can usually tell it's done once the breadcrumbs start to brown.  You don't want to overcook it or you'll have dry mac & cheese.

Monday, December 6, 2010

Zuppa Toscana (Schmambs Style)

I remember the first time I had Zuppa Toscana.  It was last year when Schmambs & the clan moved back to Massachusetts from Oregon.  Before that, I had no idea what it was.  Even after Schmambs tried to explain that the Olive Garden has it on their menu.  The lightbulb above my head remained dark.  The description on All Recipes describes it as "A creamy sausage and potato soup".  The pretty much sums it up.  Cream, sausage, potato, kale, and most importantly (in my opinion) bacon.  


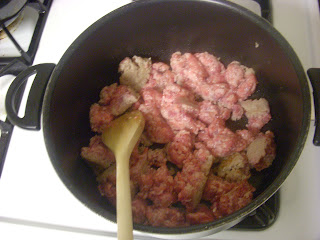
One cold wintry night, Schmambs was trying to figure out what to make for dinner.  "You haven't made your Zuppa Toscana in a while.", I stated.  She replied, "Well that's cause it's been too hot.  Now's the time for it."  So it was decided.  By the time I arrived after work, Schmambs had already started browning the sausage.  


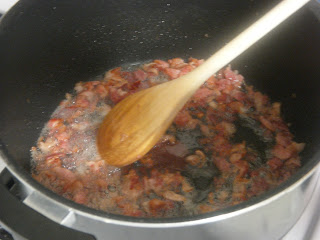
After browning the sausage, she put it aside and had hubby cut a few strips of bacon and get that sizzling.  The recipe recommended six strips.  Key word, recommended.  We may have been a little more on the liberal side on the number of bacon strips we used. 

Next up came the chopping of the garlic, onions, and potatoes.  Since she is only one woman, hubby played sous chef as he chopped the potatoes and monitored the cooking of the bacon.  The onions proved to be a bigger challenge than anticipated as halfway into the task, Schmambs had to take a time out due to not being able to see.  Tears streaming down her face prompted the little one to ask, "Mommy, why are you crying?"  After a short break, Schmambs was able to finish the task while blinking back tears.


You want to cook the garlic and onions a bit before adding the rest of the ingredients to the pot, so they went in with the bacon.  After that cooked for a bit, the sausage, water, and cream were added to the pot.  I'll admit, it wasn't the most appetizing site.  Just a big pot of...white water...with stuff in it.  But I know that it's not how a food looks when it's being prepared, it's the final presentation that matters.  And judging by the way her kitchen smelled, I knew we were in for a treat.


While the soup was being brought to a boil, Schmambs started chopping up the kale.  It doesn't take long to cook - you still want to retain a little bit of crispness, and it gives the soup a bit of color.  I mean, you saw the picture above, right?  It needs a little something instead of drab white.  Chop chop chop went Schmambs.  Before I knew it, it was time to throw it into the pot and mix it in.

  
After letting it cook for a few minutes, dinner was ready to be served.  But wait!  Schmambs had a surprise.  She had also made mini loaves of Italian bread!  With a few spices and she even put cheese into the dough!  It was absolutely delish and went perfectly with the soup.  The little one feared the kale, but gobbled down half a loaf and then asked for more.  It was the perfect meal to warm yourself up on a cold night.


Zuppa Toscana (Schmambs Style):
adapted from the recipe on All Recipes 

* 1 lb Italian sausage removed from castings
* 4-5 Yukon gold potatoes
* 1 medium sized onion
* 6-10 slices of bacon
* 3-4 loves of garlic
* 2 Cups of kale
* 1 Quart of chicken broth
* 1/3 Cup cream

Brown sausage in pan or pot.  Put aside.  Cut bacon strips into bite size pieces and cook in pot that you will be cooking the soup in.  (This is so you don't have to dirty as many pots while making this dish.)  While bacon is cooking, chop up garlic, onion, and potatoes.  When bacon is fully cooked, add in the onion and the garlic and cook until onions are clear.  Then add in the chicken broth, cream, and potatoes.  Let it simmer for 15 minutes while you chop up the kale.  Mix in the kale and simmer for another 4-5 minutes.  Serve.

Friday, November 19, 2010

Schmanksgiving Eggrolls

It all started with an idea.  Schmambs invited me over for Thanksgiving Shumai night.  At first I thought she meant her chicken shumai which she made around Thanksgiving last year and was turning it into an annual event.  Lo and behold, she had been thinking about stuffing the shumai with Thanksgiving related foods.  This put my foodie brain in high gear.  I can't even begin to tell you how much I love Thanksgiving foods.  For my birthday, I requested a Thanksgiving meal for my birthday dinner.  Schmambs not only obliged, but she made her bacon turkey.  But that's another story for another time.

After putting a bit of thought into it, I thought that the filling would tear the shumai wrapper since they are so delicate.  Especially since you steam them.  So I suggested putting everything in eggroll wrappers.  I first tried "Thanksgiving Eggrolls" at one of my childhood restaurants, J.J. McKay's, and ever since, have been itching to recreate them at home.  This was the perfect opportunity.  Schmambs knows how to cook.  I'm great at tasting and making suggestions.  Schmambs' hubby guest starred with ideas of his own as well as contributed by being our fry chef.


We decided to forgo the turkey this time around and substitute it with chicken since that's what was on hand.  By the time I arrived, Schmambs had already started the process and was cooking the chicken in a skillet on the stove.


Now what to stuff them with?  Well, at Thanksgiving, it is traditional to have stuffing.  And typically, the stuffing would have celery.  We thought that the celery would give the eggrolls a bit of texture.  Originally we had planned on using green beans, but then thought they might be too crunchy (and Schmambs' hubby is not a big fan) so we changed over to celery.  It turned out to be a good call.


And of course, you can't forget the mashed potatoes.  I'll admit, we cheated (due to time constraints - a 5 year old has to eat, doesn't she?!) and used instant mashed potatoes.  Gross, right?  Well, it turned out to not be as bad as we had anticipated.  Schmambs always spoils us by making mashed potatoes from scratch.  Maybe next time.  The lumps in homemade potatoes could also give a little more texture, not that the eggrolls needed any more.  But it's a thought.  

Then came the fun part.  Getting the oil ready for the frying process and rolling the eggrolls!  I know I posted a picture of a cast iron skillet filled with oil and once you've seen one, you've seen them all, but let's just sit back for a second and enjoy all the deliciousness the oil makes food. 
  Or you could just feel sick seeing that amount of oil in one place and if that's the case, I apologize.  I am one of those that believes anything fried has to be good.  Schmambs took the lead and started putting together the first eggroll.  


Chopped chicken, mashed Potatoes, stuffing, and celery
in one happy wrapper.


Not bad for the first one, right?


Before long, we had our test batch ready to be fried.  


The suggested time for frying was 2-3 minutes.  We found that it only took about a minute to a minute and a half.  These fry fast!  And all that really needed to be fried was the eggroll wrapper.  All the ingredients in the filler had been pre-cooked.  As you can tell, the test batch came out a little burnt...


Eventually we got it right and we had a plate overflowing with golden delicious goodness.


Most places that I have eaten some sort of Thanksgiving food combo has included the cranberry sauce in the item.  We decided to be a little creative and drizzle the cranberry sauce over the eggrolls.  We cheated on this one too and used cranberry sauce from the can.  But don't worry, we didn't use it straight from the can.  We heated it up in a saucepan in an effort to get it to a semi-liquid form.  However, that didn't seem to work and we just had heated up cranberry sauce that wasn't shaped like a can.  But it did the trick.  I ended up making an eggroll with the cranberry sauce inside and I think next time we might make a few tweaks and put the cranberry inside.  But for our first go at it, the drizzle seemed like a good idea.  And of course, what is Thanksgiving without gravy?!  We used it as a dipping sauce as is used at J.J.McKay's and D'Angelo's Thanksgiving Toasted Sandwich.  Our final product was something to be proud of and it was super yummu.  


Schmanksgiving Eggrolls:


* ~ 1 lb of turkey (chicken if desired)
* 1 box of stuffing
* 2 - 4 servings of mashed potatoes
* 2 celery stalks chopped up
* i package eggroll wrappers
* 1 - 2 egg yolk
* 3-4 cups oil for frying


Cut chicken or turkey into bite-sized pieces and cook in a skillet.  Season with salt and pepper (optional).  Once meat is cooked, chop finely and place aside.  Cook stuffing as directed on box.  You can also prepare homemade according to your own recipe.  Place aside.  Chop up celery and place aside.  You can mix it into the stuffing or add it with the filling separately.  Prepare the mashed potatoes according to the box (if using instant) or according to your own recipe for homemade.  Place aside.  Separate egg yolks to use as a sealant on the eggrolls.  Place aside.  


Once all ingredients are prepared, place eggroll wrapper so that it looks like a diamond.  One of the points should be pointed towards your body.  The wrapper packaging should have instructions on how to roll the wrapper into an eggroll.  If you reference one of the pictures above, you will see how the filling should look in the wrapper.  Roll the wrapper over the filling once and then bring the sides in before rolling again.  Save a bit at the tip so you can brush the egg yolk to provide and adhesive.  Finish rolling.  


Wait until oil reaches about 350 degrees before dropping eggrolls in.  Each side should take about 30 - 45 seconds.  Make sure to monitor them as they will burn quickly.  Place on a paper towel to drain.  Drizzle cranberry sauce over eggrolls before serving with a side of gravy.

Wednesday, November 10, 2010

Buffalo Chicken Wings (Schmambs Style)

Sunday means one thing during the fall.  Football.  On game days, I head on over to my best friend's house where we watch the game, we knit, and she fills my belly with delicious foods.  One of the "regulars" that she makes pretty much every week is Buffalo Wings.  I've had them at restaurants.  I've had them at bars.  I've had them frozen from the supermarket.  But there is something about homemade wings that just hits the spot.  


Usually by the time I get to la casa de Schmambs, she has already taken care of the seasoning aspect of the wings.  A little salt.  A little pepper.  A couple of seasonings.  Toss the wings in flour and let them sit for a minimum of one (1) hour in the fridge.  They really won't look like much when you take them out to prepare them for the cooking process.  


I'll admit, it's probably not the healthiest snack out there, but I rationalize that I'm only eating it once a week, so what's the harm.  Of course, when you start doing the math, it kinda adds up, but let's just enjoy the "now" and not worry about the "later".  The first thing you want to do is to heat the oil in your deep fryer, or in our case, a large skillet, to 350 degrees.  


Once the oil reached the right temperature, Schmambs added the chicken using tongs that could withstand the extremely hot oil.  Once the chicken was in, the waiting game began.  The total cooking time is about 15 minutes, turning the wings over at the halfway mark.  


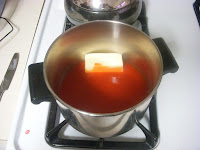
While we waited for the first batch of wings to cook, we got started on the sauce.  I never realized how easy it was to make sauce.  I always imagined it required a bunch of different spices and liquids to make it just the right consistency and spiciness.   Schmambs gave me the job of being her sous chef.  I thought she was putting a lot of faith in me not to mess the recipe up.  Then I saw the ingredients.  Frank's® Hot Sauce and 3/4 of a stick of butter.  Looked easy enough.


I continued to stir the sauce periodically while Schmambs removed the chicken wings from the oil and let them drain a bit on paper towels.  Even without being sauced, the wings looked delish.  I am not really a fan of breaded chicken, so I liked that the flour gave it a very thin outer crunchy coating without being overwhelming. And of course, the last part of making this appetizer is tossing the wings with the sauce.  With a side of Bleu Cheese dressing (personally, I prefer Ranch, but they only have Bleu Cheese at la casa de Schmambs so I make do) and it's the perfect thing to nom on while watching the game.


Served with a Smile


Buffalo Chicken Wings (Schmambs Style):

* ~3 lbs chicken wings
* 1/2 teaspoon garlic powder
* 1/4 teaspoon cayenne powder
* Salt and Pepper
* 1/2 Cup Flour (Enough to lightly coat the wings)
* 3-4 Cups Oil for Frying
* 1 Cup Frank's® Hot Sauce
* 3/4 Stick of Butter
* Dip of your choice (Bleu Cheese or Ranch Dressing/Sour Cream)

Take chicken wings out of the package and season with garlic powder, cayenne powder, salt and pepper.  After properly seasoned, toss wings in the flour so that wings are lightly coated.  Let it sit in the fridge for one (1) hour.  Heat up oil in skillet or deep fryer to 350 degrees.  Once oil reaches desired temperature, place chicken in oil carefully.  Cook for 15 minutes turning wings over halfway.  While chicken is cooking, combine butter and Frank's® in a saucepan and mix until butter is melted.  Remove chicken from oil and drain on paper towels.  Combine chicken wings with sauce and serve with dipping sauce.  Accompany with celery sticks if desired.  

Sunday, November 7, 2010

Dunkin Donuts Sausage Pancake Bites

I stop at Dunkin Donuts every day for my morning coffee.  While I've stood in line in recent weeks, I've been staring at their new Sausage Pancake Bites, recently added to their menu.  Not being a fan of pancakes, I had reservations about committing to an order.  The concept doesn't seem that different than a corndog and I do enjoy those on occasion.  Plus, I'm always up for trying new food products. So needless to say, I felt somewhat shameful when my best friend saw an advertisement on them and texted me asking me if I had tried them yet.  She's home with a 5 year old for most of the day and sometimes needs me to be her eyes, ears, and mouth in the outside world.  This was the nudge I needed to make up my mind.  I was going to take one for the team and get myself an order when I picked up my coffee.


The next day, I found myself staring at the big poster in the window advertising the Sausage Bites.  What I hadn't noticed before was that on the poster, it stated that the sausages had a "hint of maple" in them.  Just so happens that my favorite way to eat sausage is when it's dipped in syrup.  Maple, when available.  There was a rumble in my stomach just thinking of what was in store for my tastebuds.  Each order consists of 3 Sausage Pancake Bites.  They happen to be on a special 2 for deal.  Two orders for $3.  If I was sharing with one of my coworkers who had been hounding me to get them (he knows I love trying new things too), I knew I would have to double up.
Sausage Pancake Bites (Exterior View)
Despite promises of having a hint of maple in them, I wasn't brave enough to be the first to try one.  I handed two bites to my coworker so I could gauge his reaction.  It was confirmed from the smile on his face that they were delish so I rushed back to my desk to take my first bite.  It was pretty amazing.  Sweet maple taste with the salty of the pancake batter surrounding the itty bitty sausage link.  The maple flavor was a bit much For the size of the link.  It took some flavor away from the actual sausage flavor. I found myself dipping these yummu bites in a bit of ketchup to even out the sweet/salty ratio.  But you really wouldn't expect anything else from something that is mass produced and shipped to thousands of locations to be heated up in a superfast oven, would you?  And I eat microwaveable bacon, so at least this is a step above that.


Sausage Pancake Bites (Interior View)
Would I get these lil' tasty breakfast bites again?  Absolutely.  And for the record, they go great with an order of Dunkin Donuts hash browns.


Monday, November 1, 2010

Individual Biscuit Pizzas

I came home from trick or treating with my five year old niece this past Halloween with a little grumble in my belly.  It didn't matter that I had eaten a bowl of homemade chili and enjoyed quite a few panko and potato chip crusted chicken tenders.  It then occurred to me that I needed something to bring for lunch at work tomorrow.  Remembering that I had the ingredients necessary for biscuit pizzas, I figured it would be the least labor intensive and most tasty choice.

I first learned how to make these in 6th grade home economics class.  A simple recipe that even a middle school child could make without burning something down.  In the years since, I have lost the original recipe that was given to us by our teacher and have tried to improvise ever since.  It's never come out the same, no matter what tweaks I have made to the recipe and the process in how I make them.  I would have to say that this batch is the closest I have come to getting it right.


The pizzas army, ready for the oven
You start off with ready made biscuits.  I use the Pillsbury Grands flaky biscuits, which worked in my favor with the new method in how I made the pizzas this time around.  I followed the directions on the label, which required me to cook the biscuits in the oven for 14-17 minutes on 350 degrees.  I cooked the biscuits for about 12 minutes before I took them out of the oven and removed a thin layer on the top, which provided a flat surface for the pizza sauce, cheese, and toppings.  In previous attempts, I would struggle with slanted tops and trying to make sure that everything didn't end up on the baking sheet.  I then used pizza sauce from the jar (hey, I didn't say my cooking was fancy), mozzarella cheese, and alternated between pepperoni and black olives.  On some pizzas, I felt ambitious and put both toppings.  


ta-daaaa


After throwing them back into the oven for another 5-6 minutes to warm the sauce up and melt the cheese, they came out looking like this.


I'll admit, it's not my best presentation.  But when it all goes into your stomach, does it really matter?  I decided to take the tops that I removed from the original biscuits to make pizza tops.  They did not come out as I had expected, but I'm sure with practice, I'll get it one of these days.  For my first time, they were pretty decent.  I took the tops and repeated the process that I used with the biscuit pizza.  This time, however, I put the toppings on over the sauce and under the cheese.  Try something new, you know?  

Yes, there are only 6 tops...I got a little hungry
while I was making this feast
I got worried that the tops would burn if I left them in for 5-6 minutes since they are much thinner and can dry out a lot quicker.  In hindsight, I probably could have left them in for that time instead of taking them out 3 minutes early.  The cheese wasn't fully melted so when I bit into one, I could taste the shredded pieces instead of ooey gooeyness.  I'm sure when I pop them into the toaster oven to heat them up, the cheese will melt up real nice.

The Not-So-Delicious Pizza Tops
Not only did it serve as a late night snack for me, I am now armed for lunch for the next couple of days.  It's a fun dinner or snack to make, especially with kids since it can be tough to have everyone agree on what toppings to get.  Get creative!  My one regret was not having any pineapple on hand - pepperoni and pineapple is amazing.

Individual Biscuit Pizzas:

* 1 canister of ready made biscuits (like Pillsbury Grands)
* 1 jar of pizza sauce of your choice
* 1 bag of mozzarella cheese
* toppings of your choice

Bake biscuits until almost fully cooked.  Take them out 2-4 minutes before recommended cooking time.  Remove a small layer from top of biscuit to make flat surface.  If you want to skip this step, make sure the biscuit dough is pressed flat before putting into the oven.  Spread desired amount of pizza sauce evenly on each individual biscuit. Sprinkle shredded cheese and top with pepperoni, peppers, olives, etc.  Put biscuits back in over for 5-6 minutes or until cheese is melted.  Remove and allow cool.  Pizza Tops should just follow the steps above using the tops removed from the biscuits.  Have fun with it.  Be creative! There is no right or wrong way to make these.